Double welt pockets
Video
Learn welts with David Page Coffin
The November 2015 edition of Seamwork Magazine has a section called Conquering the Welt where David Page Coffin walks you through the construction of welt pockets.
David has written various books on trouser and shirt construction, and he taught online sewing classes, and hosted workshops throughout the US, and abroad.
David sadly passed away on May 2nd 2021.
He was friend of FreeSewing from the early days and we will never forget him.
Rest in peace David.
Before you start
What you need
To make double welt pockets, you will need:
- Basic sewing supplies
- The fabric or pattern piece you want to make the pocket in
- Two fabric strips for the welts
- A strip of interfacing
- Lining or other suitable fabric for the pocket bag (See fabric and colour options)
- Facing for the pocket bag, depending on your fabric and colour options
Parameters
Two values determine the size of your double welt pocket. They are:
- The pocket width: This is the width of the opening of the finalized double welt pocket
- The welt height: This is the height of a single welt, and this half of the height of our double welt pocket
In the example below, I use a pocket width of 13cm and a welt height of 0.5cm
Cutting
Pocket welts
The welts are two rectangular strips of fabric with the following measurements:
- Length: Pocket width + 4cm
- Width: Welt height x2 + 5cm
For our example:
- Length: 13cm + 4cm = 17cm
- Width: (0.5cm x 2) + 5cm = 6cm
They will form the two narrow strips of fabric that form your double welt pocket.
Make sure to respect the grainline when cutting the two welts
Pocket interfacing
The pocket interfacing is a single rectangular strip of fusible interfacing with the following measurements:
- Length: Pocket width + 4cm
- Width: Welt height x2 + 5cm
For our example:
- Length: 13cm + 4cm = 17cm
- Width: (0.5cm x 2) + 5cm = 6cm
You may have noticed that the interfacing is the same size as a welt
The interfacing is used to stabilize the pocket, and will be fused to the fabric with your iron.
Optional: Pocket facing
The (optional) pocket facing is a single rectangular strip of fabric with the following measurements:
- Length: Pocket width + 4cm
- Width: Welt height x2 + 5cm
For our example:
- Length: 13cm + 4cm = 17cm
- Width: (0.5cm x 2) + 5cm = 6cm
You may have noticed that the facing is the same size as a welt
The facing is what you’ll see when you peer through the opening of your pocket.
The facing is optional, if you do not use it, peering through the pocket will reveal whatever material the pocket bag is made from.
Pocket bag
The shape of the pocket bag depends on the pattern. For simplicity, I will use a rectangular pocket bag with rounded corners at the bottom as you may find on the back pockets of trousers.
There is typically a longer and shorter version of the pocket bag. This is because one side is attached to the top welt, while the other is attached to the bottom welt.
Construction
Step 1: Fuse interfacing in place

Fuse the pocket interfacing to the bad side of your garment, so that it covers the place where you will make the welt pocket.
Patterns typically have notches that help you determine the placement of a welt pocket
Step 2: Mark the welt pocket on the good side of the fabric
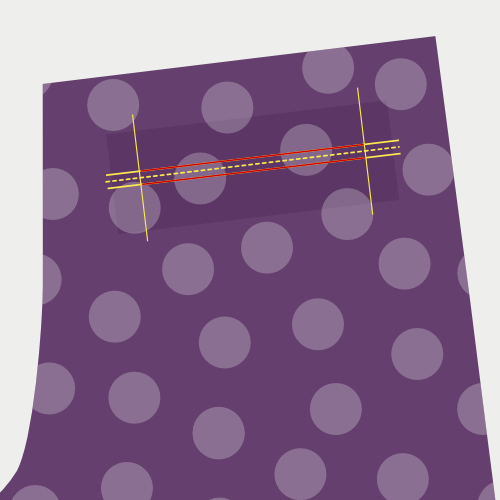
Mark the welt pocket as follows:
- Mark the pocket width with the vertical lines. Let these lines extend to help you align the welts later
- Align the center opening of the pocket with a horizontal line. Let it extend to help you align the welts later
- Mark two horizontal lines parallel to the center line, at an offset equal to the welt height (0.5cm in our example)
The part of the horizontal lines parallel to the center line that fall in between the vertical lines is where we’ll sew our welts in place. This is illustrated by the red lines.
Step 3: Fold and press the welts
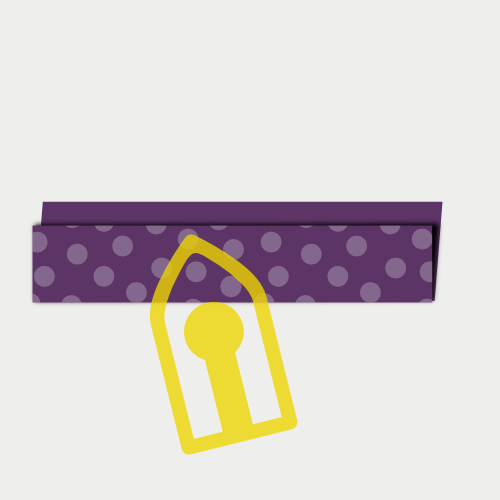
Fold the welts parallel with the long side, with the good side out.
Don’t fold them in half. Instead make one side 1cm longer than the other.
Press the fold so that it becomes a sharp crease.
By offsetting the edges, the welt edge tapers off, which reduces bulk and visibility on the outside of the garment.
Step 4: Sew welts in place
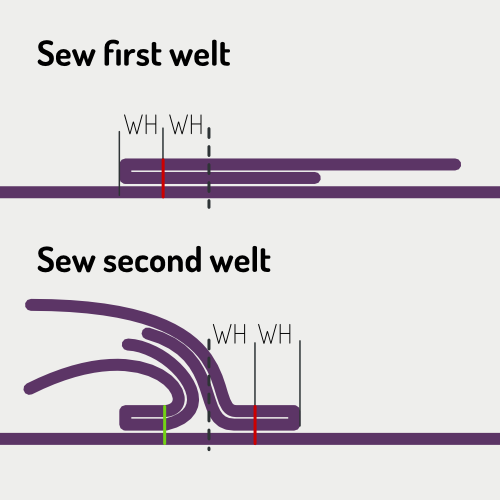
In the images above, the dashed black line is the center of the welt.
The red line shows where to sew, and the green line is a seam that has already
been sewn.
Place the welt on the good side of your garment with the shorter folded side down, and center it horizontally.
Align the folded side with the center of the welt pocket, and now shift it twice the Welt Height (WH) outwards.
In our example with a Welt Height of 0.5cm, the fold of your welt lies 1cm from the welt pocket center.
Sew your welt in place 0.5cm (WH) from the fold, or in other words, precisely on the line you marked on your garment.
Make sure to start and stop precisely on the vertical lines that indicate the pocket width.
When you’re done, sew the second welt in place. Note that this will be a bit more tricky as you’ll have to fold back the first welt, and lay part of your second welt over it.
Step 5: Cut open your pocket
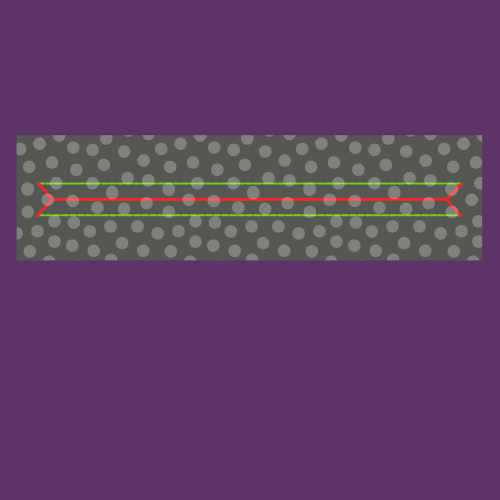
In the image, the red line marks how/where to cut open your pocket, and the green line shows the seams.
Cut open your welt pocket by cutting along the center horizontal line. Stop short of the vertical lines that mark the sides of the pocket and cut under 45 degrees to the edge of your line of stitching that holds the welts down.
Make sure to not cut into your stitches or cut too far. Make it precise.
Step 6: Flip the welts to the other side and press
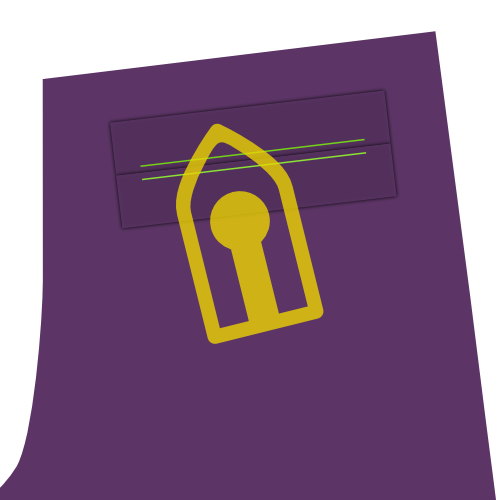
You have been sewing your welts to the good side of the fabric. Now, we are going to flip them to the back side, through the opening we just cut in the fabric.
Flip the welts to the back, and press them flat. Take your time to work the fabric into a neat rectangle before you press it down.
Make sure to press the triangular pieces of fabric (at the short edge of your opening) to the side
You’re pressing several layers of fabric. Consider pressing down (or open) the layers individually before pressing them together. This will give a sharper crease, and a neater welt pocket.
Step 7: Sew the pocket opening sides to the welts
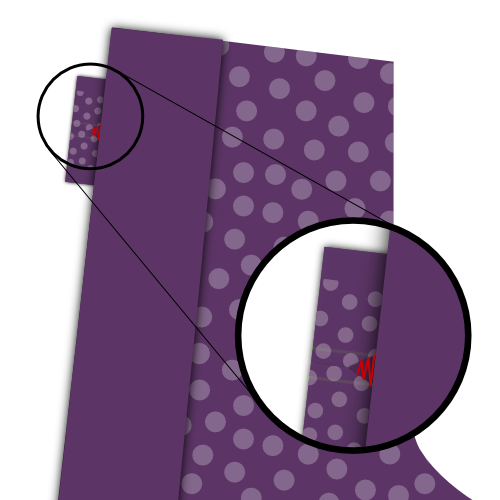
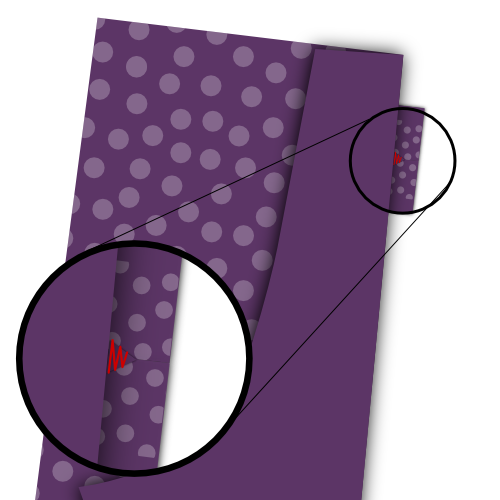
Put your garment down with the good side up, and fold it back on the side of your welt pocket, making sure to keep your welts lying flat.
Sew the triangular piece of fabric from the pocket opening to the welts.
Make sure that you do not sew into the pocket opening, as this will show the stitches on the front
Step 8: Sew the bottom pocket bag to the bottom welt
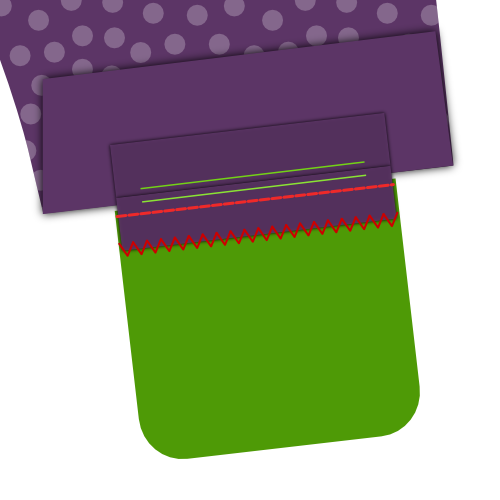
Fold your garment out of the way so you can sew the pocket bag to the lower welt.
Also finish the edge of the welt with a zig-zag stitch so the welt stays flat inside the pocket.
The pocket bag is show in lining fabric here (green) far clarity. You can also make your pocket bags from other fabric.
Step 9: Optional: Sew facing to top pocket bag
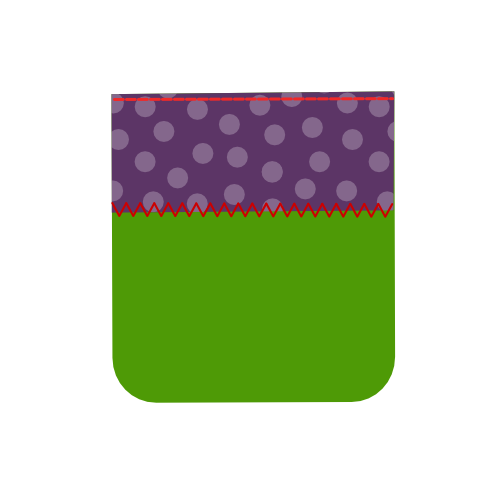
This step is optional. Attach facing to the top pocket bag if that is want you want to show through the pocket opening.
Step 10: Sew the top pocket bag to the top welt
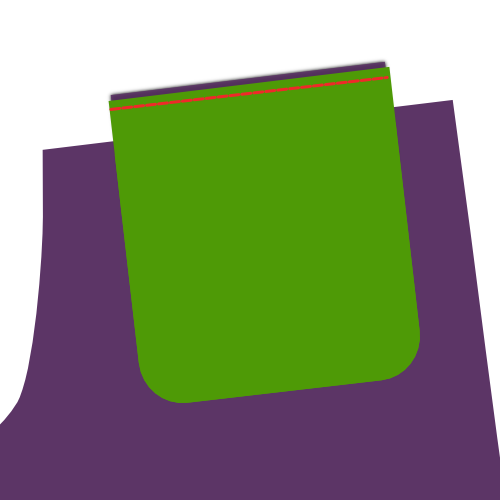
Fold your garment out the way so you can sew the pocket bag to the top welt.
If you applied facing to your pocket bag, make sure to place it with the facing towards the welts.
Step 11: Attach the welts to the pocket bag
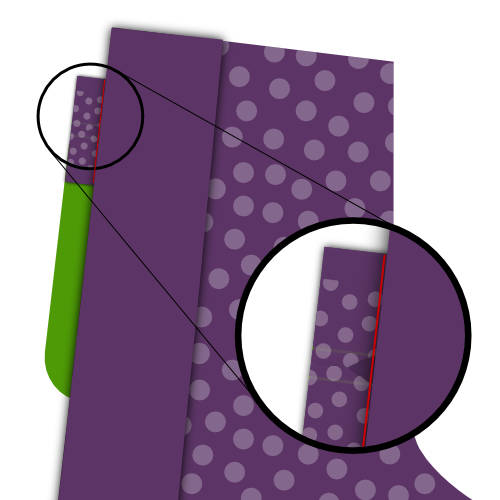
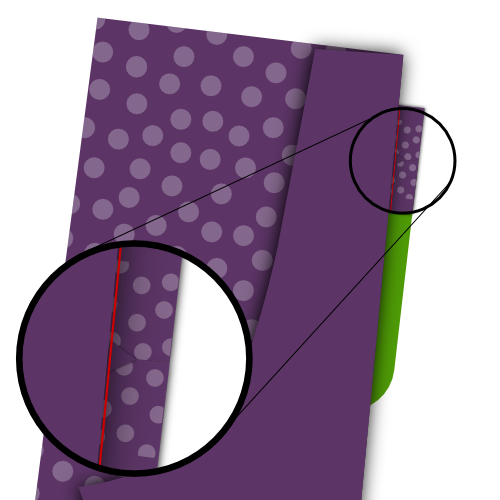
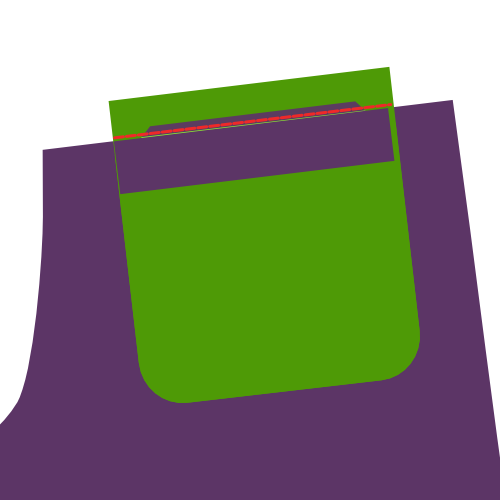
Place your garment with the good side up, and fold it back at the side of the welt pocket.
Sew the triangular piece of fabric from the pocket opening to the pocket bags, much like you’ve sewn it to the welts earlier.
Fold back your garment at the top of the welt pocket.
Now, sew the top of the pocket opening to the pocket bag.
Step 12: Finish the pocket bag
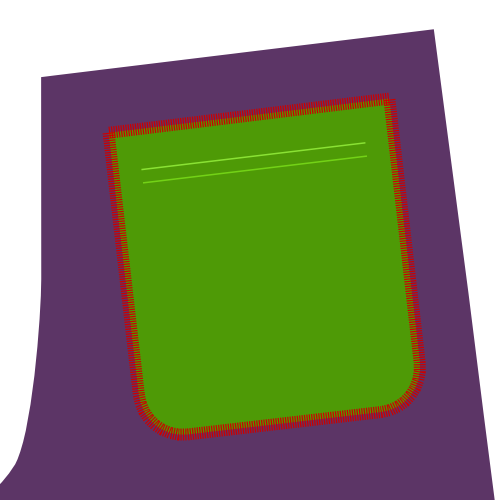
Now finish the pocket back by closing all the edges (the top edge is optional).
To do so, you can apply bias tape, use a serger, or sew some other finishing stitch.
After that, you’re done!